Here is what I made for my lovely kiddos:
A bat for my boy with a kinda creepy smile.
And a Hello Kitty with a little Halloween touch for my girl.
I know, I know it doesn't look like much but it was my first time making something like this and to be honest they turned out better than I thought but not as good as I had hoped. Clear as mud? Good. Now on to how I made them.
Bat
Step 1:
I printed out a bat stencil, cut it and traced it on black felt with fabric chalk. I used sewing scissors to cut through the felt instead of regular scissors. Prolly doesn't matter but just FYI.
Step 2:
I used a 3/4" paper puncher to make the eyes. I traced the punch out on gray felt with a fabric marker, then cut them with my sewing scissors.
Step 3:
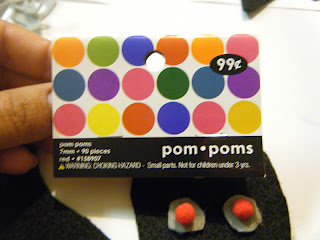
I glued the gray circles on the bat and then glued small, red pom poms on top. I used felt glue that I bought at Hobby Lobby with a 40% coupon thank ya very much.
Step 4:
I cut very thin strips of off-black felt and used those as defining lines on the bat wings. I laid out the strips they way I wanted them to look then put felt glue on top, flipped them over and pressed down.
I made the smile out of the left over cut out from the gray eyes.
Hello Kitty
Step 1:
Like the bat stencil, I found a Hello Kitty stencil and traced that one on white felt using my fabric marker. The fabric chalk was too light to see on the felt.
 |
| Be sure to put something to weigh down the paper as you trace. |
Step 2:
I then cut out the bow, eyes, nose and whiskers from the printed stencil and used those to cut out on the felt.
I traced the bow on orange felt and cut it out.
They eyes and whiskers were cut out from the black felt and the nose from yellow felt. I then used the paper stencil (what was left of it) as my guide to line up the face on the white felt. Again, I glued it all down with the felt glue.
Step 3:
I used an orange pom and some Halloween ribbon to decorate the bow. I actually did not plan for the blow to look like this but the pom was smaller than I thought so I had to use something to fill in the space. Not too shabby, eh?
Step 4:
For each one, I cut two 2" wide strips of black felt, glued one end of each strip to the cover, then used Velcro to attach them to the chairs. Note: I cut the strips down once I measured the covers up against the chairs and THEN adhered the Velcro to the strips. It's important to do this because you'll need to know where to cut down the strips if need be.
And there you have it boys and girls. Two Halloween chair covers (decor rather) for your kids chairs at the dinner table.
I know that the Hello Kitty cover isn't very Halloweenie so maybe next year I'll get more creative with HK. I almost put fangs on her but it just didn't look right. I did, however, plan to put fangs on the bat for my boy and I completely forgot. I remembered once the covers were on the chairs. My boy said that he liked it with the smile and not to worry about the fangs. This is coming from the same boy that said my Frankenstein treat bags weren't scary enough and asked me to change them up a bit. Go figure!
I'm a party girl and am linking up with:
Creations by Kara * Verry Merry Vintage Style


Debbie- these are so cute! Thank you for stopping by project queen and leaving a sweet comment about my pink pumpkins!
ReplyDeleteLove the bat chair for halloween! If you're interested, this would be a great project to link up over at the Bewitching Craft link party at http://igottacreate.blogspot.com!
ReplyDeleteThese are sweet! Thanks for linking up to Share the Love Wednesday; hope you'll be back this week!
ReplyDeleteMary