Pages

Showing posts with label halloween. Show all posts

Snack Station {Halloween}

Hello, happy Friday and happy kickoff to Halloween weekend!  I know, I know I’m rarely on here but I finally got a light under my butt to post.  I guess what really inspired me to do so is this really cute snack station I set up for my kids decked out in Halloween décor.  We already have a snack station in our kitchen but this one is just too cute to not share with y’all. Look at what this mama did for her kiddos (and herself). 


I guess you can say what started this whole décor area is that I bought a spider-web cake stand from Target (dollar spot area) a few weeks ago and I was determined to use it and not just wait for when I baked a cake.  And since it’s a spider-web I knew I had to put it to use somehow before Halloween.  Well I always have small mandarins for the kids to snack on and the whole idea grew from there.  First, I thought I would just stack on the oranges then it hit me that I could draw them like jack-o-lanterns like I’ve seen many times before.  Ta-da!


I knew my daughter would love it and she is actually the one that drew all of those cute faces.  I mean look at her designs. Too cute! My son is now a cool 13 year old so I didn't think he would be as excited but he said it was pretty awesome and "it was so lit." Holla.

I also used this spider candy dish for their fruit snacks.  I got it from Kohl's a couple of years ago (after Halloween clearance).


And this is a candle holder I got on clearance a few years ago as well.  Hobby Lobby I think? I stuck a few of Ghirardelli chocolates in there because why not?


Here is a different angle of the snack station.


To the far left is a sugar skull that I (in a decent attempt) decorated at a local bake supply store.  I love that place!  I have it sitting on my food scale and next to it is a vase (similar to this one) I filled with candy corn and stuck in some Halloween sprays I got from Michael's.


That's it.  I wanted it to make it cute and fun while still having all of their go-to snacks in easy reach and I think I accomplished it.  Now I need to think of a Thanksgiving/Fall and Christmas set-up.  Happy Halloween!

DIY Kitty Cat Costume & Makeup {Halloween}

Happy almost Halloween, y'all!  Okay so I told you all a few weeks that I was just learning how to sew and after those lunch hour lessons I decided to tackle my daughter’s Halloween costume.  She told me that she wanted to be a kitty and soon after I started looking for costumes on the web.  After some searching and not really finding what appealed to either of us I told myself: “Self, you just learned how to sew now show the world what you can do!”  Well I can’t do much but I was confident I could accomplish this mission so off to the store I went and in the end this was Kitty Cat costume I “created” for my baby girl. 

bad quality pic, sorry!

Fast and Simple Halloween Decor

Hey friends!  Guess what?  I'm just getting around to decorate for Halloween.  Finally!  I'm a little disappointed in myself because normally by October 1st I have the house decorated and in full Halloween spirit.  But for the second year in a row I'm off to a very late start, ugh!  The ONLY Halloween item I have in my house right now is the vase I put together a couple of weeks ago.  Now I have my second Halloween decor out and I put it together this past weekend in less than 10 minutes.  My girl helped me and she had lots of fun doing it.  It was easy & fun for her and there was no mess.  Yay for the both of us!


I wanted to "make" something that was quick and affordable.  So I got lucky when I walked into Hobby Lobby and found all the supplies for this little project on sale 40%-50% off (the mason jars I already owned).

Ready for the directions?
  • clean mason jars
  • open & pour Halloween popcorn into jars
  • decorate jars with stickers
  • insert battery in candle, turn on and place inside jar
  • Voila!
The supplies I used were two jars, a bag of Halloween popcorn (Styrofoam balls), scrapbook stickers and orange candle lights:


I placed them on my bookshelf with a pumpkin and a skull.  My girl loves coming home everyday to turn on the pretend candles.  And both my kids like they way it looks when the house is dim.  It gives it the "safe" eerie feeling.


Now I need to get going on the rest of the house even if the Halloween decor will only be up for a week.  Better late than never! :)

P.S. - Sorry if these pictures seem to small.  I'm trying to fix it! 

Pretty, Creepy and Sweet Vase Decor {Halloween}

Happy Sunday but most definitely Happy Fall, Y'all!  Who's happy to welcome the season? I am!  Yesterday morning the family and I woke up to some cooler temperatures.  It certainly put me in an all-things-pumpkin-spice mood. So I lit my one and only pumpkin spice candle.  Note to self: buy more of those yummy candles!

So after some Saturday giddiness I finished a little Halloween project I started a few days ago.  I got the idea from Better Homes & Gardens and I pinned it to my Halloween board on Pinterest.  At least I think I saw it on the BHG website.  I can't seem to find it anymore.  Here's my copy cat version.  


Pink Texas Chick


My Halloween & Fall Mantel


First, I’d like to say that my heart goes out to everyone in the east coast and I really do hope everyone will be okay in the end.  The whole nation has your back!
 
I thought I would share my Halloween/Fall mantel with you all.  Of course after today it will be a Thanksgiving/Fall mantel  and hopefully I’ll be able to add some turkey-type touches to it.  That’s if all the stores have not rid of their autumn related merchandise (a pet peeve of mine.)  I was inspired to do this mantel after pinning several pumpkin and witch ideas on my Fun Halloween Ideas board.  On Pinterest of course.  I realized just this Halloween that I have an attraction to pumpkins and witch hats over other Halloween decorations.  So instead of having it spread throughout my house, I decided to put it all together on my mantel and fireplace. 

Pink Texas Chick

I really do love pumpkins and witch hats and after putting this together I wish I had more.  Clearance sales here I come!  Most of these items were purchased over the years either on sale (a good sale) or on clearance.  It’s my M.O.    I did, however, buy a couple of bags of decorative squash.  After reading a short article on pumpkins, squash, and gourds in the October issue of Better Homes & Gardens magazine (p. 105); I was not only educated but inspired to use these as part of the fireplace décor.  It was fun to learn those tidbits from the article but so did my son and he is going to share that information at school in a “Show and Tell” type way.   Confession: I made him read the article but then he was intrigued and had the “oh that is kinda neat” reaction.  Yay me.
 
The witch pumpkin, boa and other pumpkins are all from Hobby Lobby. The black crow from Michael's and that witch hat is from my local grocery store. The hat was a $1 clearance score! 

Pink Texas Chick


This black lantern is from my friend's wedding.  I knew I would use it for something and it looks perfect with a mini pumpkin and squash.  The candle votive is from Hobby Lobby and the witch pumpkin from Kohl's.

Pink Texas Chick


See the pink witch hat?  I have some masking tape holding it down on the tile. And I used the black tulle to cover it up.  Thinking, always thinking I tell ya.  

Pink Texas Chick

See that ash in the fireplace?  Ignore it.  Hubby was told asked to clean it out and he has yet to do it.  Ahem.
Pink Texas Chick

So there ya have it.  My lil 'ol Halloween mantel.  Forgive the bit of blury-ness.  I have no fancy smanchy camera yet.  Anywho, I like the pumpkin and witch hat combination.  It suits me.  heehee.  Kidding.  Happy Halloween!

Oh and I'm sharing this post with Young House Love, Bower Power, the Ugly Duckling House and Our Fifth House.


That's So Witchy {Halloween DIY}

Hola!  Halloween is around the corner and I was finally able to complete this project that I started (in my head) over three weeks ago.  A couple of months ago, some friends of mine were having a garage sale.  I decided to shop at their sale and just before leaving their house I spotted a plain, maroon vase.  My friend gladly gave it to me because she was ready to pack up what didn’t sell and dump it all at Goodwill.  My first thought was to spray paint it but what color and how would I use it?  After some thought I decided to use it as Halloween décor and since I have a few witch hats I then knew what I wanted to do with this vase.


Check it, yo.


And this is what it looked like before:

It is a Pottery Barn vase.  I spray painted a Pottery Barn vase.  Gasp!


Here’s the how-I-did-it down low.

My supplies were Krylon primer, Krylon Glitter Blast in Grape Glitz, and a medium grit sanding block. 


I used an old, clean sock to wipe any dust and debris from the vase, lightly sanded it and then sprayed a couple of coats of primer.


The next day I covered it with the Glitter Blast.  I’m not expert with paint so to the naked eye it is obvious this was not done by a pro.  No prob.  I’ll “fix it” before Halloween next year ‘cause I should definitely be better by then not.


In my best amateur skills, I sprayed 4-5 thin layer coats of the paint.  I waited a couple of minutes in between each coat so I wouldn’t glob it all up.  After 24 hours of dry time I set it up on my dining room table. 

I bought these two tablecloths from the dollar store.


The hat, pumpkin and black crow were bought on clearance from previous years. I also used a small piece of cardboard to help hold the hat steady.  You like?  


Voila.  There is my dining room table a la All Hallow’s Eve mode.  I don’t do table settings, just centerpieces.  Table settings feel too fancy smanchy for me and my laid back family.  I love looking at others though!  And although Halloween is just a few days away, anyone could easily put something like this together for their Halloween festivities come next Wednesday.  Until next time.  :)

Pumpkin Spice Cupcakes {Recipe}


Hola!  As in “hi” not holla.  But hey why not? Holla!  Okay, okay today I wanted to share with you guys a cupcake recipe that I made last night for a bake sale today at my work.  We are raising money for charity and everyone was asked to bring home baked goods.  Being that we are in fall y’all, I went with a seasonal favorite: pumpkin!


I found this recipe on one of my favorite cooking websites, www.allrecipes.com and I followed the recipe to a T except for the frosting.  You can view the full recipe here or just see below.   

Cupcakes:

·         1 (18.25 ounce) pkg yellow cake mix with pudding

·         1 tsp. ground cinnamon

·         1 tsp. ground cloves

·         1 tsp. ground nutmeg

·         ¼ cup vegetable or canola oil

·         2 eggs

·         1 tsp. vanilla

·         1 15oz can pumpkin puree

Mix all of the dry ingredients with a spatula, and then add the wet ingredients mix well with an electric mixer.  Once almost incorporated add in the pumpkin and continue to mix until done. Spoon batter into cupcake pans (spray pan or insert liners) filling each cup 2/3 full.  For me, this recipe made exactly 18 cupcakes.  Bake at 350 degrees for 20-25 minutes (mine were done at 21 minutes).

Frosting:

I made my own version of cream cheese frosting which I’m sure is the same as many other people make it.  The recipe for this frosting varies so it’s basically to the baker’s liking, right?

·         8oz cream cheese, room temperature

·         1 stick unsalted butter, room temperature

·         16oz confectioner’s sugar

·         1 tsp. vanilla extract

·         2-3 tsp. ground cinnamon (for these cupcakes)

With a mixer (on low) combine the cream cheese, butter and vanilla until almost well mixed.  Continue to mix as you slowly add in the cinnamon and confectioner’s sugar.  Once done I use a spatula to give it a few hand mixes to make sure it is all incorporated.  After that you are ready to frost your cupcakes!  I use my easy accent decorator from The Pampered Chef.  It makes the presentation a whole lot prettier.

Personally, I let at least one hour of cooling time pass before I frost or I do it the next morning. 
Voila!  You have some yummy cupcakes to pass out at your Halloween parties or Thanksgiving dinner.  Holla! :)

Black Kitty Cat Treat Bags {Halloween}

Hi everyone!  Well my house is finally decked out in Fall and Halloween décor and the kids are getting in the spirit.  My goal was to have my decorations up by October 1st but eh October 15th was more do-able. 


Anywho, last year I made these Halloween treat bags and to my surprise (honestly) they were quite the hit on Pinterest among other sites.  A big ‘thank you’ is in order to everyone that pinned them and also to those other bloggers that let me share my project on their sites.  Gracias!  :)

I did not think I was going to make any bags this year because the creative side of my brain was low on juice and I had no new creations.  Then it hit me.  A black kitty cat!  My girl and I love Hello Kitty and my girl is fond of kittens because they lick your leg instead of bite it like a dog (according to her).  And since she definitely wants to pass out treats to her friends (okay I too want to pass out treats) I thought of a black cat creation with pink details.  Pink of course! 

Here is what I created:
Pink Texas Chick


Like my other craft projects it did not turn out the way I imagined it in my head but it will do and my baby girl loves it. 

Supplies:

·         1 pkg (16 count) small, black paper sacks
·         1 sheet pink glitter paper
·         1 sheet yellow, purple, & black card stock
·         1 small pkg pink/purple/fuchsia chenille pipe cleaners
·         Round & oval paper punch
·         Slot paper punch or 1 black marker
·         Adhesive dot runner, Elmer’s glue, and glue gun
·         Halloween stickers
Here is how I made this year’s treat bags.

Just like my previous Halloween treat bags and my Easter treat bags, I started out by folding the back of the bag.  I do this so I’ll know where to start decorating on the front of the bag and of course to be able to close each bag when it’s time to pass out the treats! :)


Ears & Whiskers: I cut thin strips of the glitter paper and then cut those down to the whisker size my baby girl and I liked.  I think these are kind of long about 2 1/2" but my girl liked those whiskers sticking out.  For the ears, I looked through my daughter’s school papers and looked for a triangle shape.  I found a kite on one of her coloring sheets so I cut it out and in half and that was my ear template. 
 

Eyes: I used my oval paper punch on yellow cardstock to make some eyes and the slot paper punch to make the black pupil.  Of course if you don’t have a slot punch then you can just use a black marker to draw on the pupil.
 

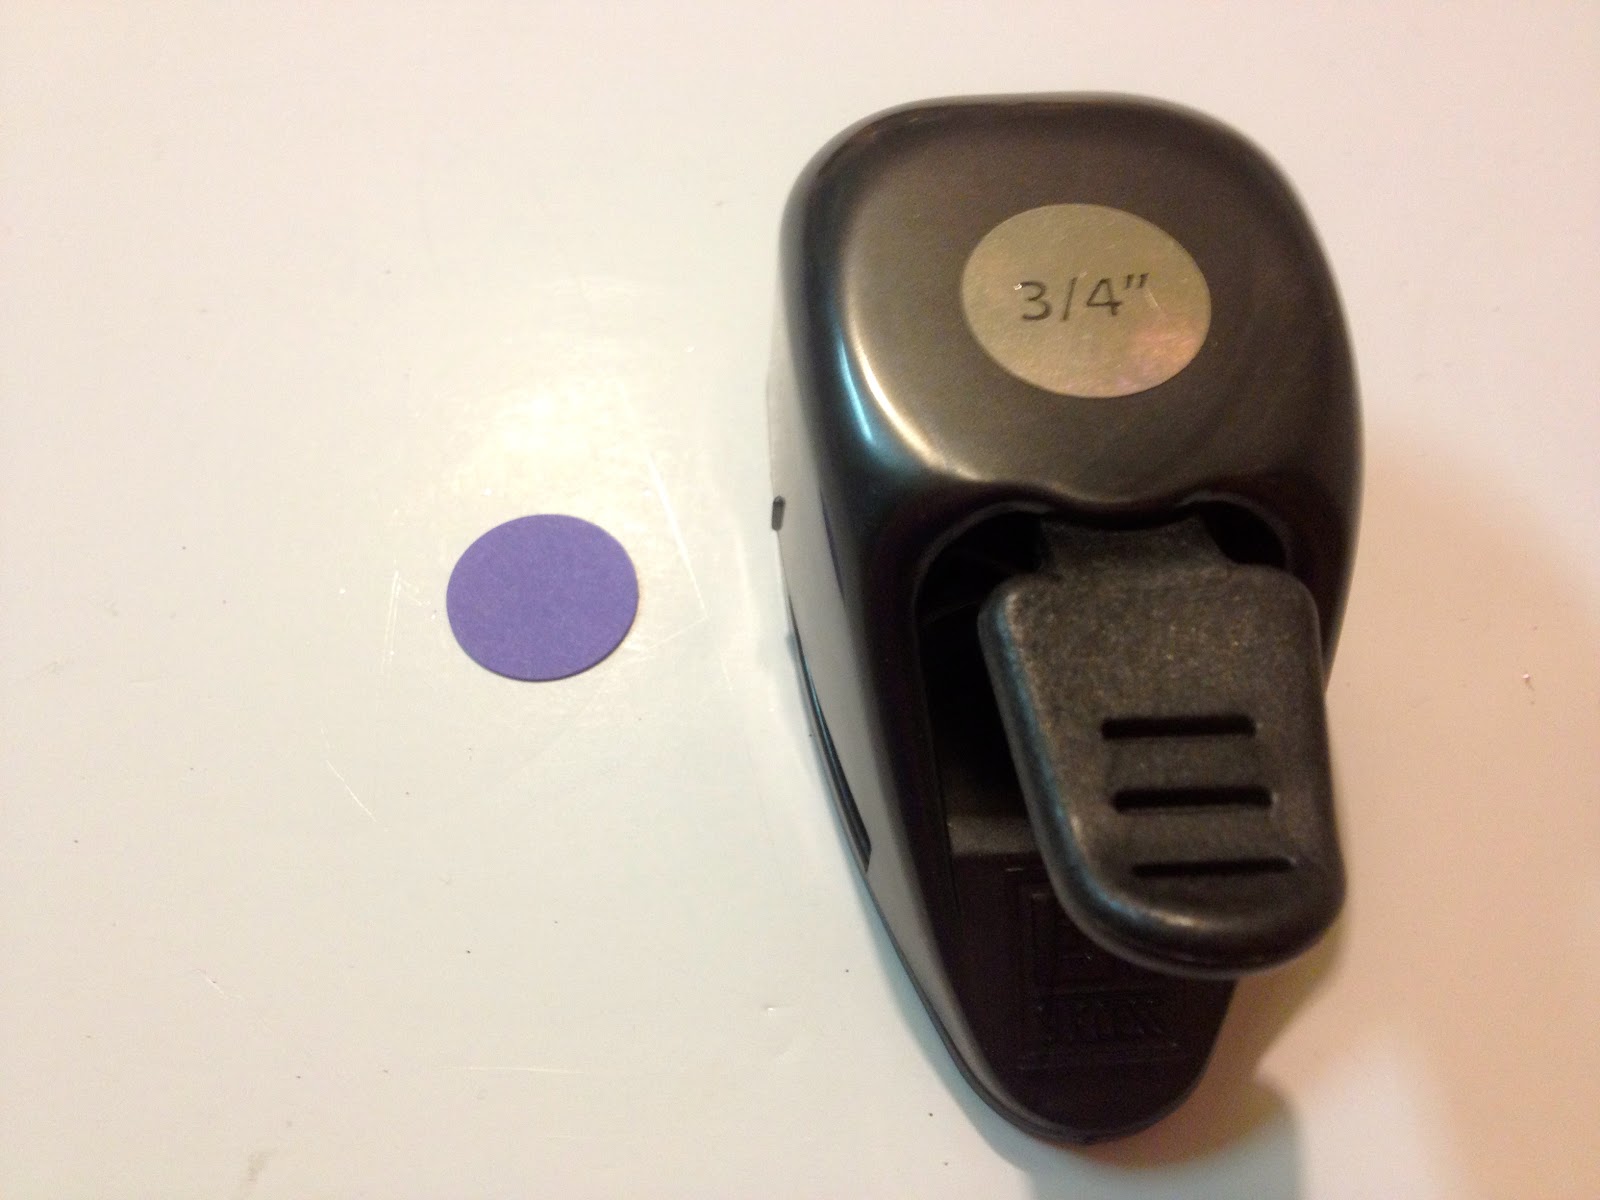
Nose:  I used a ¾” round paper punch on purple card stock for the nose.


After each piece for the face was cut I glued them on to the front of the bag using Elmer's glue for the ears and the strip dot adhesive for the eyes, nose and whiskers.


Tail: I used my finger to wrap the pipe cleaner around it and then I glued it down on the back of the back.  I didn’t want it to be completely curly so I straightened it out some to give it that funky cat look.  I used my glue gun to glue it down making a small U shape at the bottom of the tail.
 

Once it was all dry and set I put pretend goodies inside and closed it off with a sticker.  It’s not time to pass them out yet so of course it’s just a prop!  :)
 
pink texas chick


And just like all my other projects, I did not pay full price for the supplies.  Either they were on sale or I had coupons.  With the exception of the glue, card stock and paper punches, all materials were purchased at Michael’s. I used one 40% off coupon for one item and one 20% off coupon for total purchase (spent about $6 or so)


Now I just need to make a few more bags so they can be ready to go next weekend!  Happy Halloween, y’all!

The Witch Stop {Halloween Décor}

As much as I like and celebrate Halloween, I don't have much décor.  I am slowly building up my Halloween stash with every clearance sale on November 1.  J

With that said, I was able to use a few of the few things I have on hand and decorate one of my walls.  We have a narrow, almost bare wall that connects the dining room and kitchen.  All I have on it are two wall candle sconces.  Pretty boring.  Well this year I spruced the area up with a little Halloween touch and all for under $10.  Everything pictured below was purchased on clearance, sale or I already had it on hand.  I just had to get a little creative.


And this is what my wall looked like before the witch stopped on by and hung up her hat and broom.  I told ya it was boring.
First I bought two orange candles at Hobby Lobby that were 50% off and decorated them with some bat stickers that I got for 40% off also at HL.

Holy batman those turned out cute!  :)
Next I took a plain yet glittery orange broom that I had on hand and decorated it with some black, glittery tulle (50% off at HL).

I folded the tulle three fold and wrapped it around the broom like a scarf.  I also tied some ribbon around it and instantly it looks much better than just a plain-o-broom.

I then tied some Halloween ribbon to the broom and witch's hat (that I got on clearance two years ago) and hung each one from my wall sconces, then I placed the candles on top.  Ta da!  It is simple and not too much but I love it.


Happy Halloween!

Linking up with these fab bloggers:

Snack Station {Halloween}

Hello, happy Friday and happy kickoff to Halloween weekend!  I know, I know I’m rarely on here but I finally got a light under my butt to p...