Pages

Showing posts with label kids. Show all posts

Snack Station {Halloween}

Hello, happy Friday and happy kickoff to Halloween weekend!  I know, I know I’m rarely on here but I finally got a light under my butt to post.  I guess what really inspired me to do so is this really cute snack station I set up for my kids decked out in Halloween décor.  We already have a snack station in our kitchen but this one is just too cute to not share with y’all. Look at what this mama did for her kiddos (and herself). 


I guess you can say what started this whole décor area is that I bought a spider-web cake stand from Target (dollar spot area) a few weeks ago and I was determined to use it and not just wait for when I baked a cake.  And since it’s a spider-web I knew I had to put it to use somehow before Halloween.  Well I always have small mandarins for the kids to snack on and the whole idea grew from there.  First, I thought I would just stack on the oranges then it hit me that I could draw them like jack-o-lanterns like I’ve seen many times before.  Ta-da!


I knew my daughter would love it and she is actually the one that drew all of those cute faces.  I mean look at her designs. Too cute! My son is now a cool 13 year old so I didn't think he would be as excited but he said it was pretty awesome and "it was so lit." Holla.

I also used this spider candy dish for their fruit snacks.  I got it from Kohl's a couple of years ago (after Halloween clearance).


And this is a candle holder I got on clearance a few years ago as well.  Hobby Lobby I think? I stuck a few of Ghirardelli chocolates in there because why not?


Here is a different angle of the snack station.


To the far left is a sugar skull that I (in a decent attempt) decorated at a local bake supply store.  I love that place!  I have it sitting on my food scale and next to it is a vase (similar to this one) I filled with candy corn and stuck in some Halloween sprays I got from Michael's.


That's it.  I wanted it to make it cute and fun while still having all of their go-to snacks in easy reach and I think I accomplished it.  Now I need to think of a Thanksgiving/Fall and Christmas set-up.  Happy Halloween!

Slacker Mom = Tasty Cookie {recipe link}

Huh?  Confusing title, I know, but it turned out to be true for me the night before my daughter’s Valentine class party.  You see, I totally slacked this year for Valentine’s Day.  No home décor, no crafts, no cute and fun treats for my kids to give to their friends or teachers.  Nada.  So when I realized on Thursday night (February 12th) that I had not done a thing for my daughter to take to school I panicked at the disco, y’all.  And when I say it was Thursday night I mean it was like 9:35 p.m.  Slacker mom.  Especially since I made it a point to watch Grey’s Anatomy and Scandal (no slacking there!).  Side note: I get my kids ready for bed on Thursday evenings during commericals. #dontjudge #youdoittoo

So like I said, I was in a panic and quickly decided that I would make sugar cookies and put them in little sandwich baggies with curled red ribbon.  Easy enough BUT it was already late and although that is a simple recipe I did not want to take the time to soften the butter and I changed my mind about bagging them all nice and pretty.  It took a nano second to scratch that idea.  I then remembered that I had a box of devil’s food cake mix and that I had a seen a recipe for cookies on the back of the box.  Boom!  Here is what I had less than an hour later.

pink texas chick


And as the title of this post says, they were tasty and I was pleasantly surprised.  ---> I may or may not be a cookie snob and prefer from-scratch recipes. J  I followed the recipe as stated on the Duncan Hines website except for two details.  It said to use ½ cup walnuts and ½ cup chocolate chips but since it was for Valentine party, I opted for mini red M&Ms. And of course I avoided the nuts just in case anyone in the class had a nut allergy.

The recipe was not on the box with the picture but it referred to their website.  I didn't understand why they wouldn't just slap it on the back of the box but it turns our there are a few cookie recipes to use for this cake mix.  Here is the one I used in case you too are having a slacker moment or whatever. J

What about cookies for my son, you ask?  Um no.  He's in middle school now and they don't do that.  (Insert a middle schooler's voice and facial expression here).

Fast and Simple Halloween Decor

Hey friends!  Guess what?  I'm just getting around to decorate for Halloween.  Finally!  I'm a little disappointed in myself because normally by October 1st I have the house decorated and in full Halloween spirit.  But for the second year in a row I'm off to a very late start, ugh!  The ONLY Halloween item I have in my house right now is the vase I put together a couple of weeks ago.  Now I have my second Halloween decor out and I put it together this past weekend in less than 10 minutes.  My girl helped me and she had lots of fun doing it.  It was easy & fun for her and there was no mess.  Yay for the both of us!


I wanted to "make" something that was quick and affordable.  So I got lucky when I walked into Hobby Lobby and found all the supplies for this little project on sale 40%-50% off (the mason jars I already owned).

Ready for the directions?
  • clean mason jars
  • open & pour Halloween popcorn into jars
  • decorate jars with stickers
  • insert battery in candle, turn on and place inside jar
  • Voila!
The supplies I used were two jars, a bag of Halloween popcorn (Styrofoam balls), scrapbook stickers and orange candle lights:


I placed them on my bookshelf with a pumpkin and a skull.  My girl loves coming home everyday to turn on the pretend candles.  And both my kids like they way it looks when the house is dim.  It gives it the "safe" eerie feeling.


Now I need to get going on the rest of the house even if the Halloween decor will only be up for a week.  Better late than never! :)

P.S. - Sorry if these pictures seem to small.  I'm trying to fix it! 

Lunch Hour Sewing 101

Hi. My name is Debbie, I am 39 years young and this is me learning how to sew by hand.  Yes, I am learning how to sew by hand.  Finally.


And here's me proudly displaying my practice work and a few stitches.  Like five or six stitches.  Really.  And yes I did practice sewing a skull and bones patch on a napkin.  But hey at least it was a great hair day.  :)


Okay so here’s the thing.  My kids think I’m the bomb diggity.  I’m all that and a bag of chips (Doritos nacho cheese flavor); and according to them I know it all and can do it all.  My daughter says I’m the best cooker and baker.  My son thinks I know everything.  Oh what sweet creatures they are to me.  If they only knew I was just faking it to make it. For reals.
What they don’t know is that Mama doesn’t know how to sew.  I’m not talking about machine sewing which is true (more on that later).  I’m talking about grabbing a needle and thread and replacing a button on a shirt or sewing a patch on um, let’s say a Cub Scout shirt or vest?  My boy has been a Cub Scout  since he was in the 1st grade.  I have yet to sew on a patch for him.  Embarrassing I tell ya.  We had my son’s patches on his first Cub Scout shirt (navy blue) sewn on by the ladies at the Scout center store here in Austin and my co-workers mom. 
Last year he became a Webelo which meant he now had to wear the khaki  colored shirt.  Once again we went to the Scout center and had the necessary patches sewn on but there were a couple of more to come.  Most of the badges my son has earned belong on the patch or brag vest.  That vest has been in it's original package ever since we bought it way back when my boy was a first grader.  He is now a fifth grader and all of the patches he has earned have been collecting in one of his dresser drawers.  Oh how pathetic.  

I could not take the guilt or embarrasment anymore so I bit the bullet and asked my co-worker to teach me.  I did the pretty please thing too.  Like in I'm-a-desperate-mom kind of way.  Lucky for me we are buds and she loves to sew so it was a win-win.

So here I am at my second lunch hour sewing class.  The face was serious and the hair was not having it.  My hair appointment can not get here fast enough.  

I mean how obvious is it that I am such a beginner? Look at the major concentration just trying to tie a knot and then thread the needle. I'm hard core determined like that. 


Just like my first lesson, I was only able to do a few stitches.  Probably because there was a lot of laughing and joking around and maybe a little office gossip. heehee.  But as you can see this was the real deal.  No practice patch on a napkin. 


Right here you can see my progress so far.  It took me 40 minutes just to get to the halfway mark.  And of course there are obvious signs of a beginner.  One that you can't see is that the thread kept escaping from the needle. 


So I have half of one patch down and many more to go.  Look at all of these symbols of achievement waiting to get their spot on that red vest.  Actually these are just some of them.  There are lots more.  Oh boy.  


Lesson learned and lesson learning all in one. Note to self: don't ever procrastinate again and don't be so afraid to learn something so basic and useful.  Now I'm off to buy some band-aids because that needle poking is no joke.  Hey give me a break, I'm just a beginner.  :)

Summer Ain't Over But School Is In Session

Happy Thursday!  Today is my Tuesday and then it's Friday.  Yippee!  I took some time off to spend with my daughter before her first day of Kindergarten.  Yep, school has started for us and yesterday was her first day.  She was terribly excited and she even had a pep in her step...

Pink Texas Chick
Come on, Daddy!

Facing One Of My Worst Fears

My earliest memory of learning what to do in an emergency situation was in the third grade. I remember learning what to do in a fire drill, tornado drill and all about 'Stop, Drop and Roll.'  I even remember learning how to escape from the back of a school bus in case of a fire or accident. And I most definitely remember the various scenarios my classmates and I were given in case of an emergency.
  • don't panic
  • stay as calm as possible
  • know your location, address, phone number
  • if someone is hurt, stay with them
  • give the 911 operator as many details as possible until help arrives
Of course there are many more but the ones I just listed pertain to what happened at my house on Saturday, February 16th.  It was the first Saturday of the year that we did not have any commitments or major errands to run.  It felt so good to be able to sleep in, eat breakfast and stay in my jammies.  I had plenty to do around the house but because I had all day to do it; knowing I did not have to leave and I had no intention of leaving my house I was kinda taking my sweet time.  The day was all mine and my plans were to dedicate it to me, the family and the always countless chores.  But first I wanted to watch a little tube and get my FoodNetwork and HGTV fix.  Next to me on the couch was my beautiful girl playing on the iPad in her cute and colorful strawberry night gown, bed head still in tact.  After getting some laundry started and working on other chores I told baby girl that it was time for her to get out of her PJs.  I called for her to follow me as I walked to her room; she stopped playing with her toys and ran after me.

Then IT happened and the whole day took a different direction.


One of my worst fears came true and I was home alone when I turned around and saw my baby girl lying on the floor, unresponsive, eyes rolling back and scaring me so bad I began to sweat, plead and pray.  

You see I was practically in her room when I called for her so I didn't see her get up from the leaving room floor and run down the hall.  I didn't see her hit her head on the corner of a toy storage as she quickly trotted by like any playful five year old.  I did, however, hear her hit herself and I thought it was her hand or elbow thinking it happened because she was running.  You know how we sometimes hit our hands, wrists, elbows or stub our toes when quickly passing by furniture or a door?  Well she hit the the side of her head on a toy storage about as tall as her.  That hit/bump on her head must have triggered something even though it was not a hard hit.  Her head hit the toy storage in passing and she continued to run towards her room.  She cried a little and complained some saying that she hit herself and with my perifiel vision I could tell that she was rubbing her owie.  I still thought it was her elbow.  My back was pretty much to her because I was picking up laundry from the floor and putting it in the hampers.  

"Silly girl you know you gotta be careful when you're running around," I said to her as I finished picking up the dirty laundry.  I began to turn to her as I finished my sentence and that is when I heard her collapse on the floor and saw her fall straight back and heard her head bump the floor.  For a split second I thought she was having some kind of fit because she hit herself and I quickly realized something was happening to her.  It was so surreal and it was happening in slow motion.  Her body was in a weird S shape formation, her fists were clinched, her head slowly started to twist to the left as her eyes began to roll back and then flutter to the left.  And her body was slowly slithering on the floor as it was happening.  I also could not tell if she was moaning or grunting.  I kept calling her name but nothing.  Oh yes I freaked the eff out and ran to call 911.  

Panicked? Yes.  Calm? Sorta.  I do remember breathing hard as I begged the operator to help me.  I thought she put me on hold but she was actually dispatching the ambulance to my house after I told her who I needed from the three choices she gave me (Police, Ambulance or Fire).  I explained what happened and I told her that in all honesty it looked like my daughter was possessed.  Okay maybe I wasn't as calm as I thought because I do remember stuttering quite a bit while explaining to the operator what was happening to my daughter.

My daughter's seizure-like episode was over in about a minute.  It happened so fast and when it was over she started to cry, picked herself up and went to her bed.  She was burning up and continued to cry.  Her eyes were closed the entire time and she just kept crying.  At this time she was responsive and within a few minutes the fire department and a sheriff were at my house.  I'm so thankful that we have a fire station in my subdivision.  A few minutes after they arrived the paramedics showed up.  By this time my daughter had stopped crying, was calmer but was a little feisty with all the big, scary men in her room.  She would not let any of them touch her until the paramedics arrived.  One of them was a very nice lady that happened to have pink sparkly nail polish and pink sunglasses.  Score!  My distraught little diva allowed the stylish paramedic to exam her.  Whew.


So to make a long story even longer, baby girl checked out fine with the paramedics including her temperature.  They and the firemen concluded that she probably had a febriel seizure.  Since she the episode was over in a very short amount of time and she was okay, it was strongly recommended that we take her to the doctor or the hospital to be checked out completely.  Well although her pediatrician has Saturday hours they weren't able to see her because they weren't properly equipped to exam her (for a seizure).  We were told to go to the ER.  So off we went to Dell Children's Hospital.  Again she was examined and I told the story for like the fifth time that day while her vitals were checked.  Later when the doctor came to see her I told the story again. He ordered a CT scan which was normal and finally after about 3 1/2 hours were discharged but told to follow up with neurology in 3-4 days.  Oh what a long day (and story)!  

Not happy to be at the hospital
As instructed, we followed up with the pediatric neurologist a few days later and once again I told the the ever so repeated story of what had happened to baby girl.  She was examined and her motor skills were tested all of which was fine and normal.  I guess it would have ended her with a final diagnosis of "sometimes one-time seizures happen and we don't know why" but because my husband had a few seizures as a child an EEG was ordered.  ugh.

A week later (yes, there was a wait for an EEG) baby girl and I were back at Dell Children's Hospital for this test that I dreaded.  Why?  Because she HAD to fall asleep for this test to be conducted and getting this girl to nap is not easy.  Well we my husband did his best to keep her sleep deprived the night before (she got to watch t.v. until midnight) and we woke her up extra early the next morning.  I felt horrible for doing that to her especially since her appointment was not until 1:30 p.m.!  Her teacher already knew that she would be leaving early that day and that she would not be napping with her class at 12:30 p.m.

Baby girl and I arrived to the hospital shortly before 1p.m. to fill out paperwork and what not and then we headed down to the EEG lab to get started. 


The prep work is what took the longest and thankfully there was a t.v. in the room to keep my girl distracted and still for the EEG tech. Um, I think that is what she is called.  And then it was finally time for her to sleep so the test could be conducted.  At first I thought it was goign to be a struggle because baby girl was scared and couldn't relax.  The tech was able to do some breathing exercises with her and I pulled out my iPhone and turned on the white noise app I love so much.  And finally she was sound asleep.


Time to wrap this story up you say?  Yeah this is one long post.  A week after baby girl's EEG test I was told by the neurologist's office that everything came back normal and she appears to be fine.  What is "everything" by the way?  It was concluded that this was probably a one-time episode and could have been her body reacting to that hit she took to the side of her head.  Her pediatrician even said that sometimes the body reacts differently to temporary pain and seizures or seizure-like episodes can happen.  Tomorrow will be two months since that day and I am just now able to write about it.  Yes, she is fine and yes she is healthy living a happy 5 year old life but that one moment scared the beejeebers out of me.  Too many crazy thoughts ran through my mind. 


Her Daddy and I are ever so thankful that she is healthy and we are especially thankful to the Travis County Fire Department, the Austin/Travis County EMS and most certainly to the Dell Children's Medical Center.  The kindness, compassion and professionalism they all exuded was exactly what a terrified mother needed to stay calm.  And in case you are interested (or need a refresher) on knowing what to do and say once you dial 9-1-1, here is a helpful link. 

Lessons Learned: Barbie Doll Cake + Recipe

Okay so in my last post I shared with you all the Barbie doll cake I made for my daughter's birthday party earlier this year.  Just an FYI, I looooove to bake but I still don't know what I'm doing.  I have yet to take any baking classes or any of those cake decorating classes offered up at Michael's, Hobby Lobby or cake supply stores.  I want to.  Believe me I do but Mama just doesn't have the time, yet.  Le sigh.

So I thought I would let you all know some of the deets to the doll cake.  First thing is that I did not take many pictures while I made the cake or after!  I am so mad at myself.  I was a little stressed this day because of the challenge at hand but I really thought I had taken plenty of pictures.  After the day was over I looked through the pictures on my iPhone and realized I had very few.  Oh I was so sad.  I hope my baby girl can forgive me in the years to come. 

Here is one of her and her beloved cake just before we sang Happy Birthday to her.  Yes, I blurred her out on purpose.  But you can still see a sweet, happy girl.  :)


This picture was taken by my aunt (thank you, Aunt Lita!) and if it had not been for her then I would really be in trouble.  As far as I know, this is the only solo picture of the cake at the party. 


As you can see, I have the cake on a round board covered in pink foil paper.  It is actually two round cake boards made of cardboard taped together.  I then covered the entire board with light pink foil.  My huz bought the foil for me (in a desperate situation) at Make It Sweet cake supply store here in Austin.  I am in heaven whenever I walk into this newly expanded bake shop!  They sell decorative foil in many fun colors.  Among lots and lots of baking supplies.


Now I said that my hubby went out and bought the foil for me in desperate situation.  Like five hours before the party.  The reason is because I was going to originally decorate the cake board with white fondant so that the cake could stand out as much as possible.  Cause you know I wanted that pink dress to shine!  Well that attempt went sour muy pronto.  I wanted to do the fondant the way I saw laurapoopie do it on one of her YouTube videos.  I have seen this video a total of umpteen times so I was confident I could do it.  Not!

Mistake numero uno.  The white fondant I had in my pantry was too old.  Or not plastic wrapped properly because the thing was rock solid. 


Mistake number two: I thought I would try it anyway.  I put the block of fondant in the microwave for a couple of minutes to soften it up and then cut it up into chunks.


Disaster.  I was able to roll out just a couple of pieces and the rest was just hopeless.  Ugh.  This is when I sent my hubby to the Make It Sweet store and get that pink foil.  My man and pink foil to the rescue. 


And remember those emergency cupcakes I mentioned in the last post too?  The ones I had to make because the dome cake did not bake all the way.  Well they were lifesavers because there was enough cake and cupcakes for everyone.  And yes they were delicious thanks to a recipe I used from my January/February 2013 issue of the Food Network magazine.  I think it is one of my new favorite recipes.  I used the same recipe for the cakes and cupcakes.  I'm telling ya this is one yummy recipe.  Box mix?  Pfft!


Basic Vanilla Cake Recipe

-2 sticks unsalted butter, room temperature (plus extra for pans)
-3 cups all-purpose flour, plus more for pans
-1 tablespoon baking powder
-1/2 teaspoon salt
-1 1/4 cups sugar
-4 large eggs, room temperature
-1 tablespoon vanilla extract
-1 1/4 cups whole milk (I used strawberry flavored milk to make it a strawberry/vanilla cake)


  1. Preheat oven to 350 degrees.  Butter two 9 inch round cake pans and line bottom with parchment paper; butter the parchment and dust the pans with flour, tapping out the excess.
  2. Whisk 3 cups flour, the baking powder and slat in a bowl until combined.  Beat 2 sticks butter and the sugar in a large bowl with a mixer on medium-high speed until light and fluffy, about 3 minutes.  Reduce the mixer speed to medium; beat in the eggs, one at a time, scraping down the bowl as needed.  beat in the vanilla.  (The mixture may look separated at this point.)  beat in the flour mixture in 3 batches, alternating with the milk, beginning and ending with flour, until just smooth.
  3. Divide the batter between the prepared pans.  Bake until the cakes are lightly golden on top and a toothpick inserted into the middle comes out clean, 30 to 35 minutes.  Transfer to racks and let cool 10 minutes, then run a knife around the edge of the pans and turn the cakes out onto the racks to coll completely.  Remove the parchment.  Trim to tops of the cakes with a long serrated knife to make them level, if desired.
This recipe is straight from my Food Network magazine.  Instead of two 9 inch cake pans, I made three 8 inch cake pans following the same directions.  I also used the same recipe for my emergency cupcakes and just adjusted the time to 25-30 minutes.  It all depends on your oven.

Oh and the cake that I baked in my Pampered Chef batter bowl was in the oven for about 50 minutes at 325 degrees.  I did some research (after the fact) and found out that the cake needed to be in the oven longer and at a lower temperature.  But there are so many testimonials out there about baking a cake in a batter bowl so this is something that I'm going to figure out on my with more trial and error.  Womp, womp.  

The frosting I used for both the cake and cupcakes was cream cheese frosting. I prefer cream cheese frosting over butter cream any day.  That recipe is easy cheesy.  This one I've had and got it from one of my All Recipes cookbooks.  Not sure if they still print them.

Cream Cheese Frosting

-1 stick unsalted butter, room temperature
-1 8 oz. brick cream cheese, room temperature
-4 cups powdered sugar
-2 teaspoons vanilla extract
-red food coloring (few drops)

  1. Beat butter and cream cheese until well blended.
  2. Add vanilla until incorporated and gradually add the powdered sugar until smooth and creamy.
  3. Add a few drops of red food coloring until you get the desired shade of pink.  Again a gradual step, you can always add but you can't take away!
I doubled this recipe since I knew I was going to need quite a bit for the cakes and cupcakes.  Oh and I don't have a picture of the cupcakes with frosting.  Again, I was horrible with pictures that day.  But they pretty much looked like these (below) minus the tiaras and pearl candies.  These cupcakes were from her birthday party last year.  I made the cream cheese frosting except I cut back a bit on the powdered sugar and added a couple of tablespoons of strawberry jam.  I eyeballed it really.


So these are some of the lessons learned while making my daughter's doll cake.  I gave myself a few gray hairs that day but it was all my fault for not allowing myself a practice round.  I learned the hard way.  But you know what?  I was actually impressed for pulling it off and our guests were impressed too.  Receiving compliments from our family and friends was very nice to hear but most of all my baby girl was happy with her cake and that is what matters.  Right?  Oh why didn't I take more pictures?  Grrrrrrr.

My Favorite Night Time App

Hey everybody!  I hope all my fellow Americans went out and rocked their vote today.  I'm so glad all this election bizness is almost over and done with and we can happily move on to the next mudslinging event.  (insert sarcasm)

Anywho, lots of my Facebook friends are saying what they are thankful for each day and today I thought I would let you all know that I'm thankful for the Ambiance app on my iPhone and iPad.  The best white noise app in my opinion.  And it's free!


And my favorite sound selection on Ambiance is Rain and Thunder in the Rain category.  It soothes me and my kiddies to sleep and there have been mornings when I wake up thinking that it actually rained the night before.  :)


Oh how I have loved white noise since the days we brought my son home from the hospital.  I quickly realized the importance of white noise and finally "got it" after hearing people talk about it here and there.  Oh yes siree Bob is white noise a necessity in my home.  The kids fall asleep faster and much easier with a little background noise.

Every night when I tuck the kids into bed, I have the iPad in hand and they tell me which sound they want for the night.  Sometimes it's an ocean sound and sometimes it's a rain sound.  So far this is what they like and we have not gone past these two sounds.  Although the app has 27 different sound categories (free) to choose from and then they have their premium sounds which cost $0.99 each.  They even have an Animal sound category.  Grunting pigs or howling monkeys, anyone?  Yes, those are real sound selections. 


Another favorite feature about this app is that it has a timer.  I remember when it didn't have a timer and it would drain my battery dry.  Now I get to choose a timer when I tuck the kids into bed or when I tuck myself into bed.  Yes, every now and then I need this app to help me fall asleep.  There are nights when I have too much on my mind and I need help getting some zzzzz's. 


Anyone else love this app as much as my kids and I do?  May you all have a restful night tonight.  I suggest using this app if you need help.  :)

Black Kitty Cat Treat Bags {Halloween}

Hi everyone!  Well my house is finally decked out in Fall and Halloween décor and the kids are getting in the spirit.  My goal was to have my decorations up by October 1st but eh October 15th was more do-able. 


Anywho, last year I made these Halloween treat bags and to my surprise (honestly) they were quite the hit on Pinterest among other sites.  A big ‘thank you’ is in order to everyone that pinned them and also to those other bloggers that let me share my project on their sites.  Gracias!  :)

I did not think I was going to make any bags this year because the creative side of my brain was low on juice and I had no new creations.  Then it hit me.  A black kitty cat!  My girl and I love Hello Kitty and my girl is fond of kittens because they lick your leg instead of bite it like a dog (according to her).  And since she definitely wants to pass out treats to her friends (okay I too want to pass out treats) I thought of a black cat creation with pink details.  Pink of course! 

Here is what I created:
Pink Texas Chick


Like my other craft projects it did not turn out the way I imagined it in my head but it will do and my baby girl loves it. 

Supplies:

·         1 pkg (16 count) small, black paper sacks
·         1 sheet pink glitter paper
·         1 sheet yellow, purple, & black card stock
·         1 small pkg pink/purple/fuchsia chenille pipe cleaners
·         Round & oval paper punch
·         Slot paper punch or 1 black marker
·         Adhesive dot runner, Elmer’s glue, and glue gun
·         Halloween stickers
Here is how I made this year’s treat bags.

Just like my previous Halloween treat bags and my Easter treat bags, I started out by folding the back of the bag.  I do this so I’ll know where to start decorating on the front of the bag and of course to be able to close each bag when it’s time to pass out the treats! :)


Ears & Whiskers: I cut thin strips of the glitter paper and then cut those down to the whisker size my baby girl and I liked.  I think these are kind of long about 2 1/2" but my girl liked those whiskers sticking out.  For the ears, I looked through my daughter’s school papers and looked for a triangle shape.  I found a kite on one of her coloring sheets so I cut it out and in half and that was my ear template. 
 

Eyes: I used my oval paper punch on yellow cardstock to make some eyes and the slot paper punch to make the black pupil.  Of course if you don’t have a slot punch then you can just use a black marker to draw on the pupil.
 

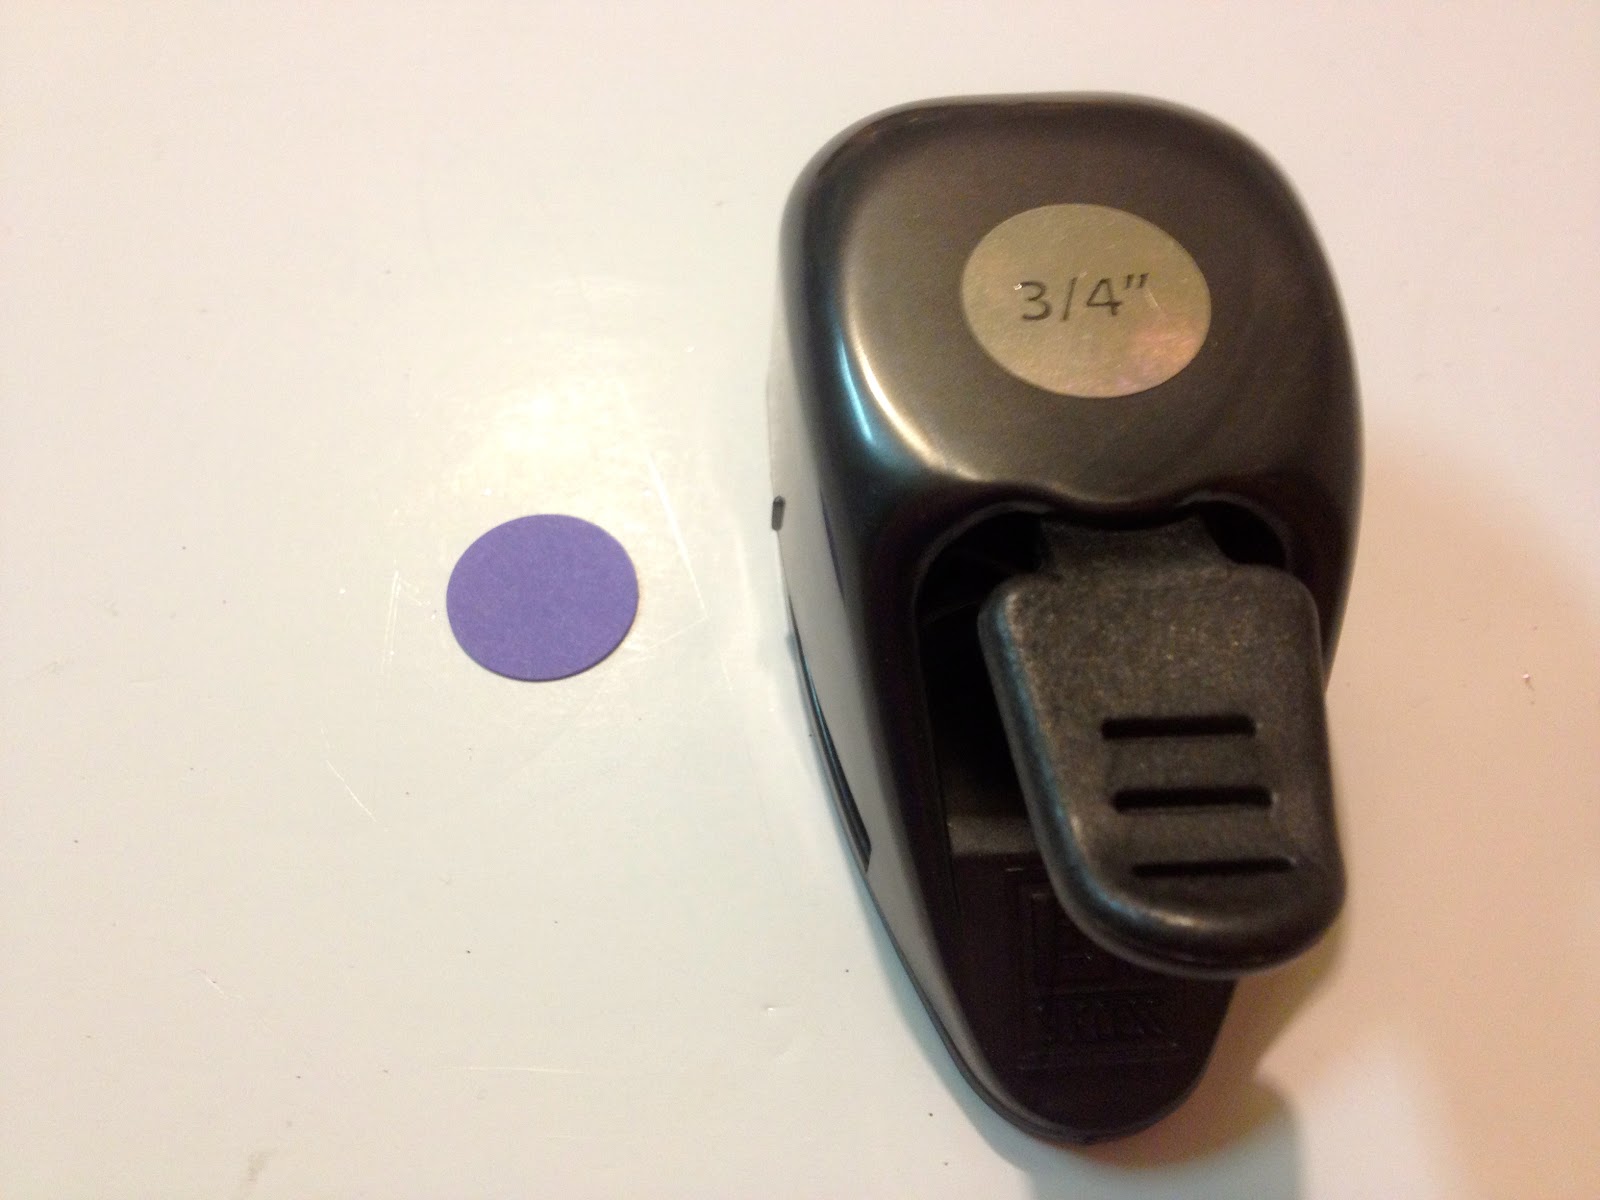
Nose:  I used a ¾” round paper punch on purple card stock for the nose.


After each piece for the face was cut I glued them on to the front of the bag using Elmer's glue for the ears and the strip dot adhesive for the eyes, nose and whiskers.


Tail: I used my finger to wrap the pipe cleaner around it and then I glued it down on the back of the back.  I didn’t want it to be completely curly so I straightened it out some to give it that funky cat look.  I used my glue gun to glue it down making a small U shape at the bottom of the tail.
 

Once it was all dry and set I put pretend goodies inside and closed it off with a sticker.  It’s not time to pass them out yet so of course it’s just a prop!  :)
 
pink texas chick


And just like all my other projects, I did not pay full price for the supplies.  Either they were on sale or I had coupons.  With the exception of the glue, card stock and paper punches, all materials were purchased at Michael’s. I used one 40% off coupon for one item and one 20% off coupon for total purchase (spent about $6 or so)


Now I just need to make a few more bags so they can be ready to go next weekend!  Happy Halloween, y’all!

Easter Bunny Treat Bags {Craft DIY}

Happy Spring everyone!  We here in Texas are lovin' this great weather but many of my peeps are also suffering from seasonal allergies.  Boooooo!  I feel their pain.  I used to be in the same boat month after month.  Anywho, let's get to my latest creation.  I will be the first to admit that it did not quite turn out the way I pictured it in my head but my two cute handy sidekicks gave me their "thumbs ups" approval.  Yay me. 


A Pink and Zebra Hair Bow Holder {Cute!}

Last weekend one of my bff's had her daughter's third birthday party and the theme was pink and zebra.  Right away I knew that I wanted to get her a gift with that color scheme.  I looked around a couple of stores but didn't find anything that really caught my eye so I said the heck with it and told myself to make her a gift.  I pondered for a bit and remembered that I had seen hair bow holders at holiday type craft shows and on the internet here and there.  I had never made one and figured it couldn't be all that difficult, right?  Nope it wasn't and I was actually surprised and a little pleased with myself.

Okay here is how beginner crafter me did it and if there is a better or easier way then please help a sista out and lemme know!  :)

Here is this pretty little thang I made.


Step 1:
I used a 16"x20" canvas, a bottle of bubblegum pink Americana acrylic paint, a wide sponge brush and a paper plate.  Oh and some newspaper too of course.


Step 2:
Let the paint dry for at least 4 hours or overnight like how I did. Use three three different colored/design ribbons for the board.  Cut each ribbon long enough to fold over on the back for gluing. Lay the ribbon out on the board to determine the spacing.  I used a few of my daughter's bows to help me space out each ribbon before gluing them down to the back side of the board.

Step 3:
Tape each end of each ribbon down on the board BEFORE you begin to glue.  Yes, this was a little time consuming for me but it was the only way I could think of keeping the ribbon in place in order to flip the board over for gluing.
Step 4:
Carefully flip the board over and start gluing each ribbon end with a hot glue gun. Take the tape off of the glued end before working on the other side.  This way you will be able to give the ribbon a little "pull" before gluing the second side.  Gluing both ends of the ribbons and then removing the tape may leave a little too much space between the ribbon and board. 


I used the back of a spoon to smooth out the glue because it was a bit too hot for my fingers.  I also used a ruler to guide me as I want along just to make sure my ribbon was not off center.

Step 5:
Flip the board over and make sure all  is good and securely glued.  It's beginning to look purdy purdy!
Cut a piece of ribbon (I used the zebra design) a little longer then the width of the board.


Fold the ribbon in half, cut it and place it design side down on the back of the board. Glue it down, flip it over again and tie a knot at the top. 

Step 6:
Okay, we're in the home stretch.  I didn't want to hand this board over with just ribbon on it so I thought adding her name with some black chipboard letters (scrapbooking section at Hobby Lobby) and touch of bling would give it that perfect touch.

I lined up the letters on the board and then glued each one down with my hot glue gun. It's been over a week since I gave her this gift and the letters are still holding up but I think there is a better alternative to the hot glue gun for this one.  A couple of the letters were a little wishy washy so I added more glue and stuck them back on.  Still, will use different glue from now on.  Not sure what kind as I need to research that mo' better.


Here it is again and with the pretty little princess happily posing with it.  Ain't she a cutie?


I was a little proud of myself and it looks much prettier in person.  I think I will make more!

FYI: I purchased most of the supplies from Hobby Lobby either on sale or with a 40% off coupon.

I'm linking up with these fab bloggers:

Snack Station {Halloween}

Hello, happy Friday and happy kickoff to Halloween weekend!  I know, I know I’m rarely on here but I finally got a light under my butt to p...