Anywho, last year I made these Halloween treat bags and to
my surprise (honestly) they were quite the hit on Pinterest among other
sites. A big ‘thank you’ is in order to
everyone that pinned them and also to those other bloggers that let me share my
project on their sites. Gracias! :)
I did not think I was going to make any bags this year because the creative side of my brain was low on juice and I had no new creations. Then it hit me. A black kitty cat! My girl and I love Hello Kitty and my girl is fond of kittens because they lick your leg instead of bite it like a dog (according to her). And since she definitely wants to pass out treats to her friends (okay I too want to pass out treats) I thought of a black cat creation with pink details. Pink of course!
I did not think I was going to make any bags this year because the creative side of my brain was low on juice and I had no new creations. Then it hit me. A black kitty cat! My girl and I love Hello Kitty and my girl is fond of kittens because they lick your leg instead of bite it like a dog (according to her). And since she definitely wants to pass out treats to her friends (okay I too want to pass out treats) I thought of a black cat creation with pink details. Pink of course!
Here is what I created:
Like my other craft projects it did not turn out the way I
imagined it in my head but it will do and my baby girl loves it.
Supplies:
·
1 pkg (16 count) small, black paper sacks
·
1 sheet pink glitter paper
·
1 sheet yellow, purple, & black card stock
·
1 small pkg pink/purple/fuchsia chenille pipe cleaners
·
Round & oval paper punch
·
Slot paper punch or 1 black marker
· Adhesive dot runner, Elmer’s glue, and glue gun
·
Halloween stickers
Here is how I made this year’s treat bags.
Just like my previous Halloween treat bags and my Easter
treat bags, I started out by folding the back of the bag. I do this so I’ll know where to start
decorating on the front of the bag and of course to be able to close each bag
when it’s time to pass out the treats! :)
Ears & Whiskers: I cut thin strips of the glitter paper and then cut those down to the whisker size my baby girl and I liked. I think these are kind of long about 2 1/2" but my girl liked those whiskers sticking out. For the ears, I looked through my daughter’s school papers and looked for a triangle shape. I found a kite on one of her coloring sheets so I cut it out and in half and that was my ear template.
Ears & Whiskers: I cut thin strips of the glitter paper and then cut those down to the whisker size my baby girl and I liked. I think these are kind of long about 2 1/2" but my girl liked those whiskers sticking out. For the ears, I looked through my daughter’s school papers and looked for a triangle shape. I found a kite on one of her coloring sheets so I cut it out and in half and that was my ear template.
Eyes: I used my oval paper punch on yellow cardstock to
make some eyes and the slot paper punch to make the black pupil. Of course if you don’t have a slot punch then
you can just use a black marker to draw on the pupil.
Nose: I used a ¾” round
paper punch on purple card stock for the nose.
After each piece for the face was cut I glued them on to the front of the bag using Elmer's glue for the ears and the strip dot adhesive for the eyes, nose and whiskers.
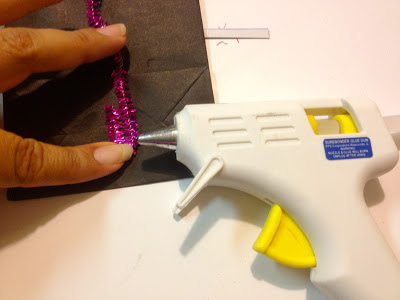
Tail: I used my finger to wrap the pipe cleaner around it and then I glued it down on the back of the back. I didn’t want it to be completely curly so I straightened it out some to give it that funky cat look. I used my glue gun to glue it down making a small U shape at the bottom of the tail.
Once it was all dry and set I put pretend goodies inside
and closed it off with a sticker. It’s not
time to pass them out yet so of course it’s just a prop! :)
And just like all my other projects, I did not pay full
price for the supplies. Either they were
on sale or I had coupons. With the
exception of the glue, card stock and paper punches, all materials were
purchased at Michael’s. I used one 40% off coupon for one item and one 20% off coupon for total purchase (spent about $6 or so)


I loved your other gift bag ideas, and this one is cute too Debbie!
ReplyDeleteThank you, Kara! :)
Delete